How to change video quality on Netflix
In this article, I will show you how to change video quality on Netflix easily on your Netflix mobile app on iPhone, iPad or Android.
First of all, you need to make sure if your plan supports HD.
- If you have opted for 1 screen SD plan, then Netflix does not allow the option to change the video quality
- If you have opted for 2 screens and 4 screens at a time Netflix plans, then only Netflix provides an option to change video quality to HD or Ultra HD


Their two reasons for the poor video quality on Netflix which are
- Poor internet speed
- Playback settings not defined
By default, Netflix sets the playback quality to auto to get the best-uninterrupted video viewing experience based on the internet speed. Netflix has three other option beside auto playback quality
- Low: This Netflix quality setting provides basic video quality and consumes only 0.3 GB data per hour of usage
- Medium: This Netflix quality setting provides standard video quality (SD) and consumes 0.7 GB data per hour of usage
- High: This Netflix quality setting provides the best video quality (HD) and consumes 3 GB data per hour of usage and 7 GB data per hour for Ultra HD
So, depending on what video quality you want you to have to pick the right option in Netflix playback Settings. The higher the option you choose, the better video quality you will get.
How to change video quality on Netflix app
- Launch your Netflix app on your mobile
- Enter Username, Password and sign in
- Choose a Profile if you have multiple profiles, the settings will be applicable to the only selected profile
- Click on the More Option at the bottom right corner of your screen
- Click on Account. A webpage will open that will show all Netflix account settings
- Scroll down at the bottom and click "Playback Settings"

- By default data usage per screen is set to "Auto" to change video quality to high, Select "High" and Click "Save"
- You will see "Playback settings saved"

Watch this Video
How to change video quality on Netflix PC | Computer
- Open Netflix website in the web browser
- Enter Username, Password and sign in
- Choose a Profile if you have multiple profiles, the settings will be applicable to the only selected profile
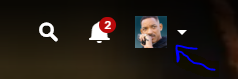
- Click on the Profile Photo located at the upper right corner of the screen
- Click on Account. A webpage showing all account information and settings will open
- Scroll down at the bottom and click "Playback Settings" under "My Profile Option"
- By default data usage per screen is set to "Auto" to change video quality to high, Select "High" and Click "Save"
- You will see "Playback settings saved"
That's it, in this way you can change video quality on Netflix on mobile, computer and easily fix poor video quality on Netflix.
0 comments:
Post a Comment